Here were the instructions for this weeks challenge:
1. The colors for challenge 7 will be black and white and no more than one other color of your choice. You can include multiple fabrics in each color, but only 3 colors can be used.
2. Your finished project can be any size, but cannot be a square or a rectangle in shape. It can be
either 3D or flat.


I made an open/closed sign for the front door of my shop. What shop? you ask? My fantasy shop in my head, of course! At Karen's Crafty World you can come and do art and craft and sew. We will drink coffee and /or wine. We will snack on morning glory muffins as the sun rises and cheese and crackers while the sun sets. Like-minded people will come from far and wide to see such a wondrous place! My shop will sell vintage crafts that I've collected over the years from thrift stores. Vintage fabrics, vintage linens and all sorts of gently used art supplies will be for sale. There will be several tables to spread out on for folks to do their work. There will tables with sewing machines and tables with art supplies. There will be a big comfy sitting area with a library of art books, quilt/sewing books,etc. Oh, and this fantasy shop will be in my big Victorian house. The whole downstairs will be the shop and art areas and the upstairs will be our private living area. My husband is not yet on board with my fantasy but I plan to wear him down.
I've been into quilt/mixed media collaging lately, so this project was really fun. I first sewed together 2.5 inch squares and stipple quilted it. I then cut out the shape of a sewing machine.The border was done using another new-to-me technique. I twisted 3 pieces of black yarn together and sewed them then sewed it to the quilt. Then the embellishments which was the funnest part! (is funnest a word?)
The sign in the middle of the piece turns over to open and closed.
I wanted the whole thing to look just a bit raggedy, and I think I achieved that. (Actually that's not hard for me to achieve as most of my pieces are a bit raggedy....even if I'm not trying!)
Supplies used:
Fabric, Heat &Bond, blue,black and white thread, black yarn, buttons, pins, sewing needle,dmc black and blue floss, letter buttons, navy blue ink pad, fabric glue, Black Zig pen. Measuring tape, pattern and scissors all fussy cut from vintage fabric.
Techniques used:
Stipple quilting, couching of black yarn, thread painting (dress form), stamping.
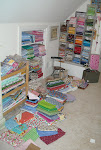
All supplies came from my stash. 0 dollars spent.